First connect Crossuite to your email address. To do this, go to Settings > Communication > Email address configuration and edit the email address in the list with the pencil icon.
Set the “Email provider” to Microsoft 365 and log in with your Microsoft account.
If you get a message that the administrator still needs to give consent, they can grant it via https://entra.microsoft.com/ under Enterprise apps > Admin consent requests.
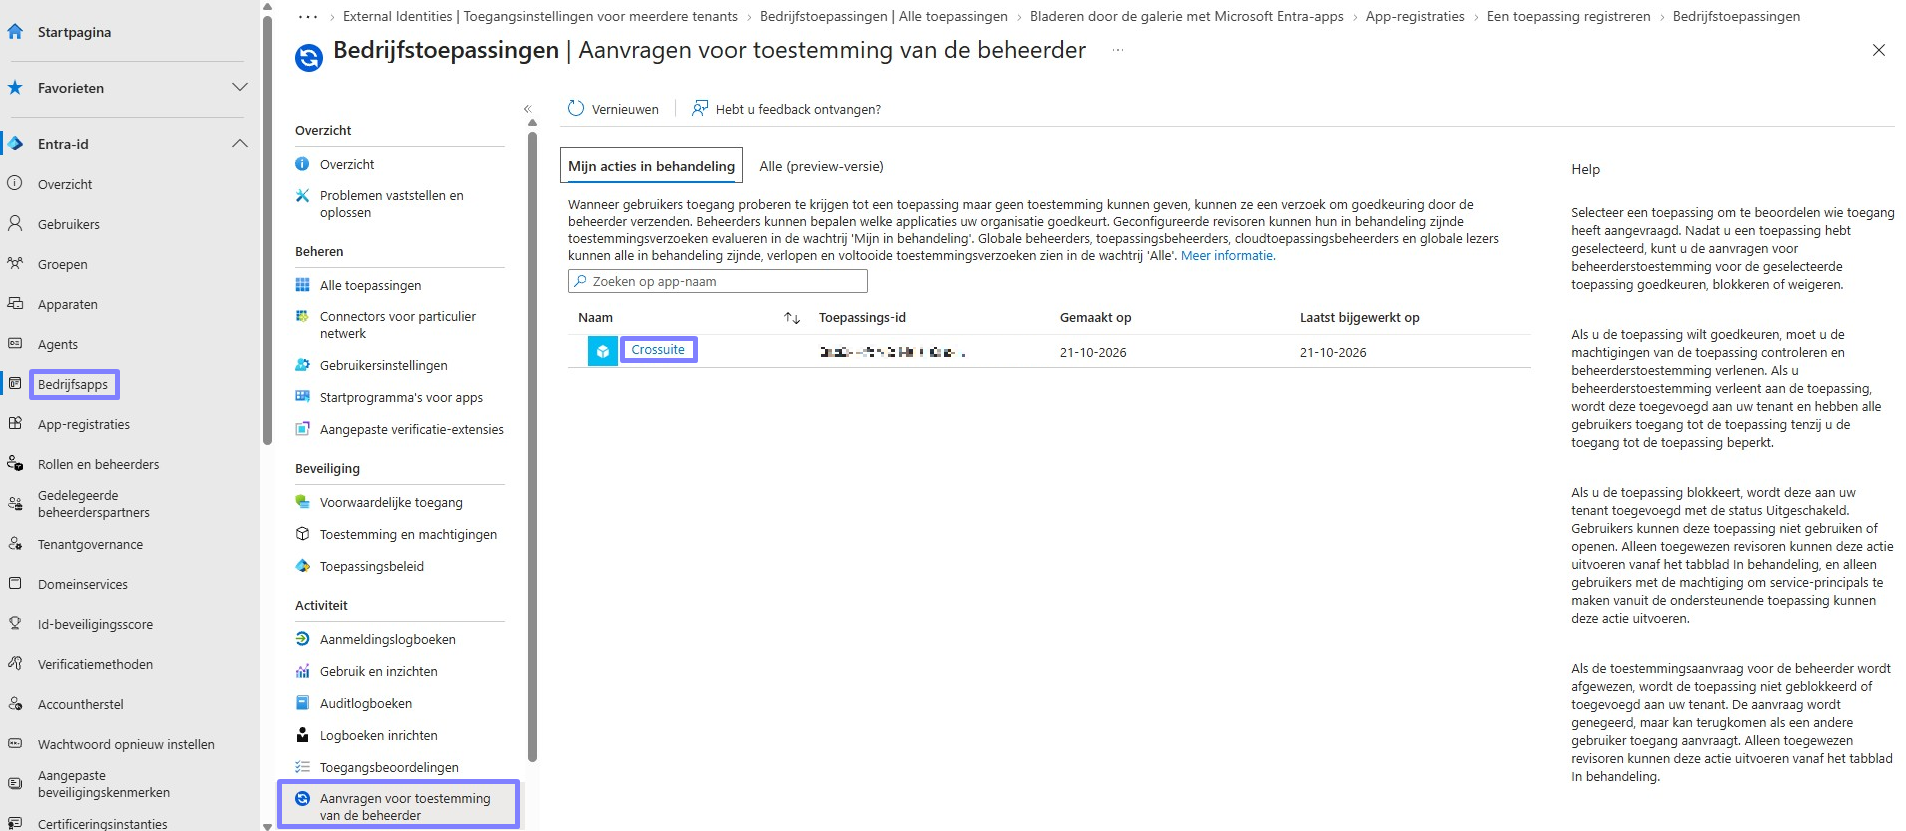
Once your IT administrator has given consent, log in to your Microsoft account again via Settings > Communication > Email address configuration.
Then click the “Verify configuration” button.
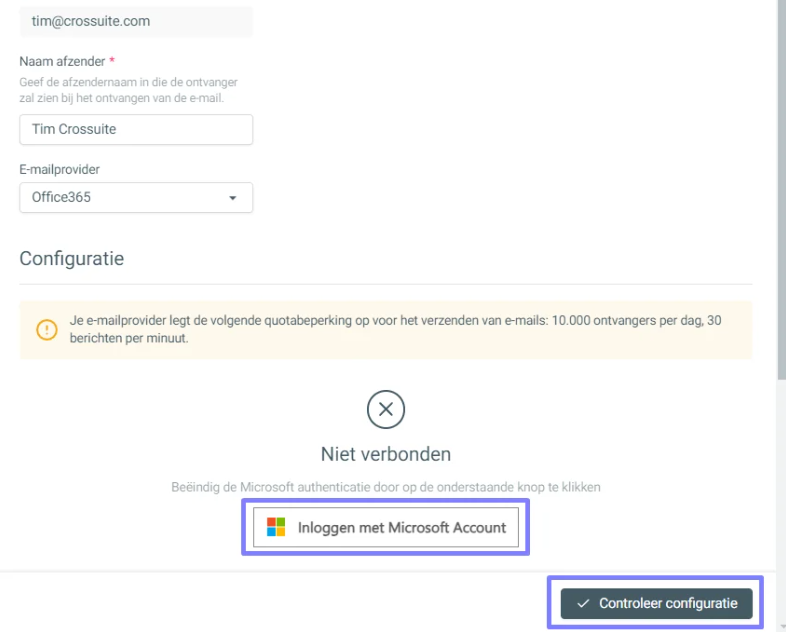
If you get a green message, the email connection works and your emails will reach patients successfully.
If sending emails still causes problems or error messages, not all settings of your Microsoft account may be configured correctly yet. Your IT administrator can fix this by following the steps below.
In the left menu, go to Users → Active users. Click the user of the email address that Crossuite uses.
Open Licenses and apps and check that a suitable licence is assigned, such as Microsoft 365 Business Standard or Exchange Online.
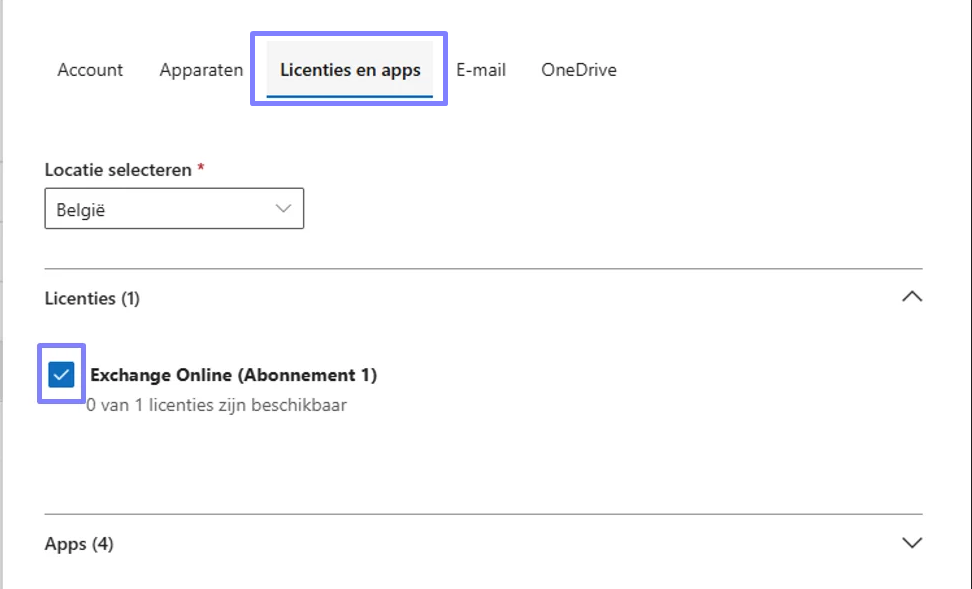
If the mailbox does not have an Exchange Online licence, the email administrator first needs to activate it.
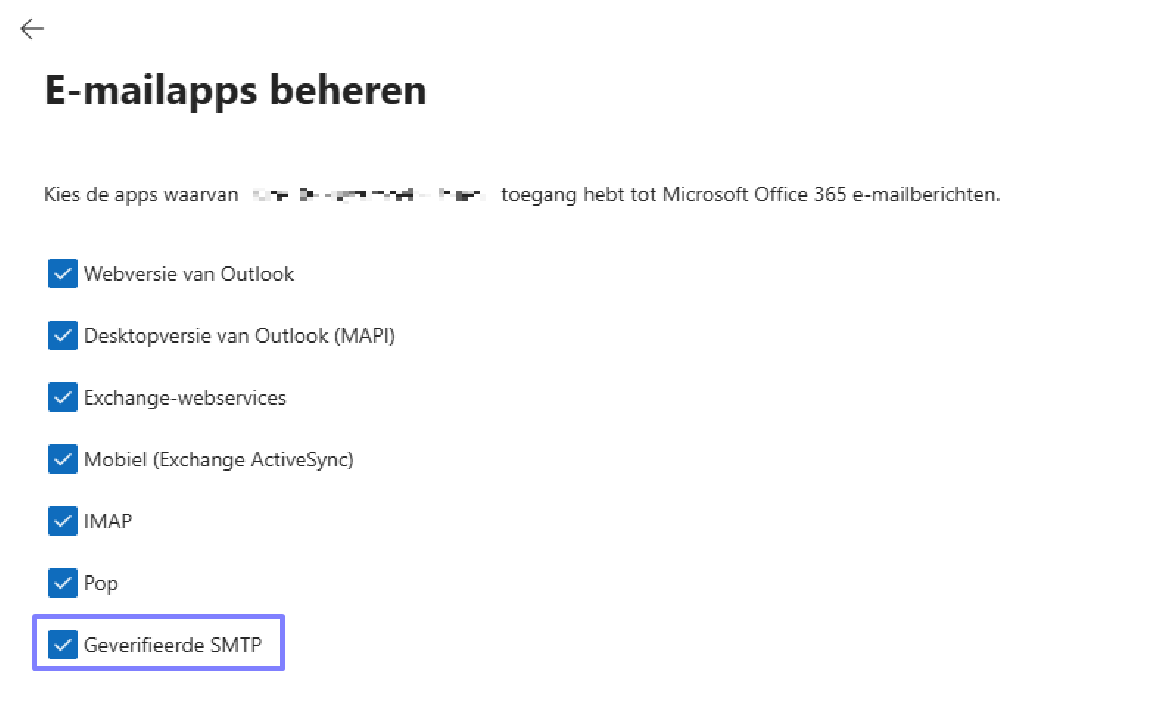
In the same screen, open the Mail tab next to “Licenses and apps”. Click Manage email apps.
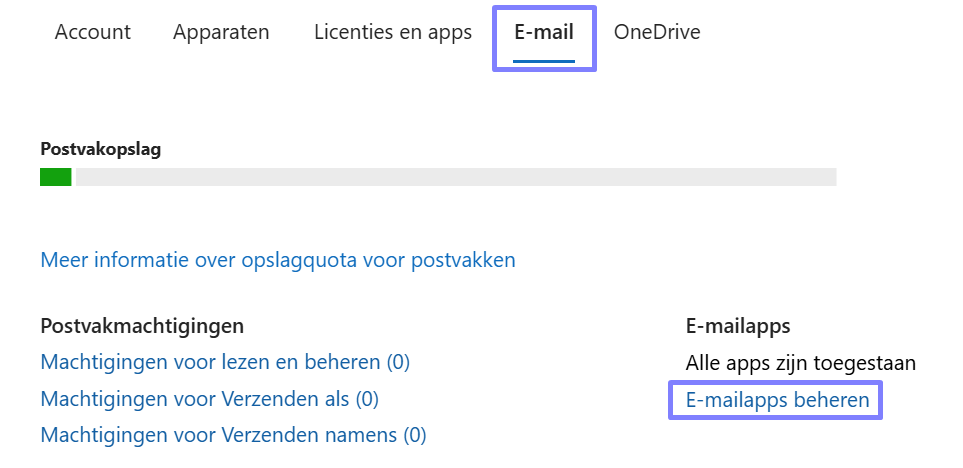
Check the “Authenticated SMTP” box here.
Go to Entra ID → Enterprise applications → All applications. Click Crossuite.
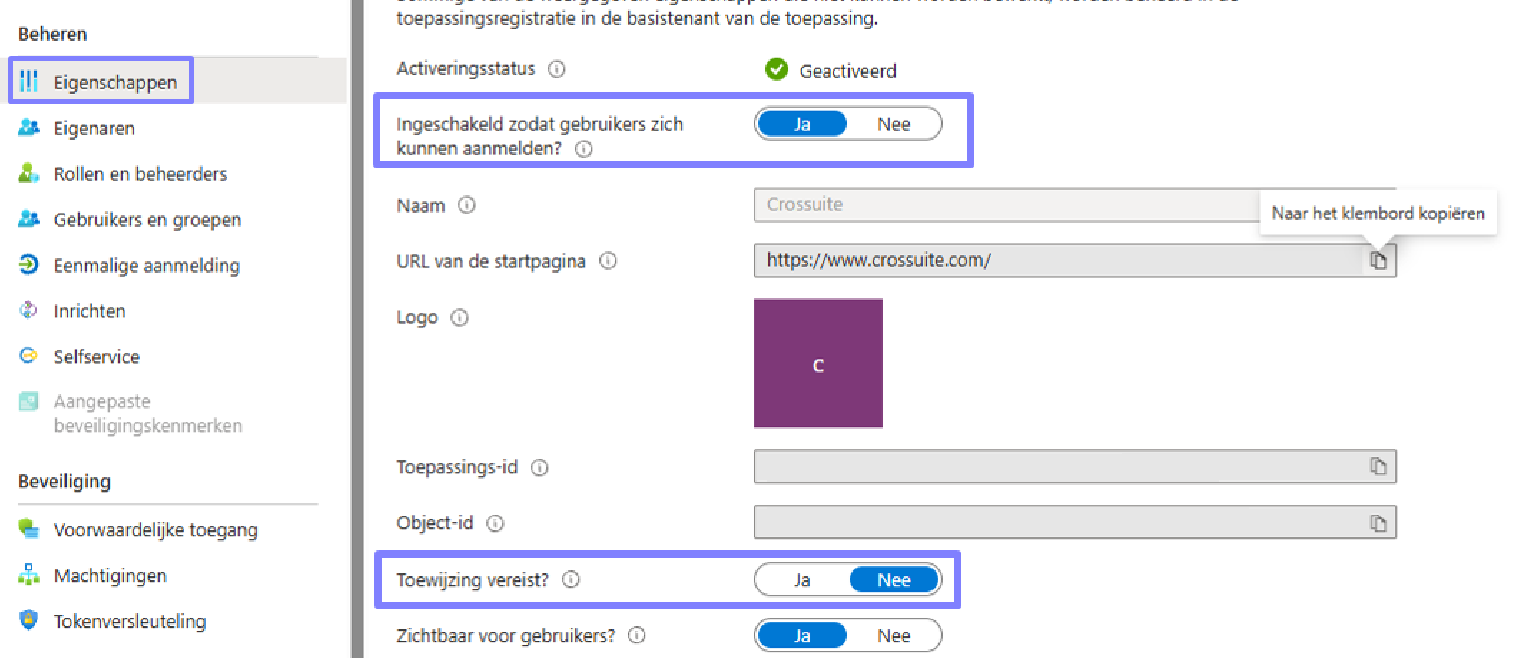
Click Properties on the left and set the following 2 values:
Setting | Value |
Enabled for users to sign in? | Yes |
Assignment required? | No |
Check the API permission
Go to the Microsoft Entra admin center.
Open Entra ID → Enterprise applications → All applications.
Search for and open Crossuite.
Click Permissions on the left.
At the top of the page, look for the Grant admin consent button. Click this button, even if consent has already been given.
On the left, go to Settings > Mail flow. Uncheck ‘Turn on use of legacy TLS clients’ and save.
Once all of this is set up, log in to Crossuite again in an incognito tab.
Go to Settings > Communication > Email address configuration and edit the email address in question with the pencil icon.
Make sure the SMTP type is set to Office365 and log in with your Microsoft account.
First log out of your Microsoft account here, then log in again. Then click “Verify configuration”. Emails should now arrive again without error messages.